Sunday, January 3, 2016

Southern Aurora Finally finished

My Southern Aurora's Inaugural Run on the Mudgee Line.


 Double 44's, hauling the Southern Aurora the way it should be, though they are a bit too clean.
 
Passing Portland Station on the UP.   


If you look real hard you might be able to see the revelers enjoying themselves in the Lounge Car.


Well its been a long time coming but finally my version of the Southern Aurora  following Ian Blacks Article is done and had its inaugural run on my layout.

A comment was made in one of the previous posts as to what paint I'd be using to paint the models & I said I would be using the Stainless Steel colour from the Alclad 2 range. I had read up on using this system and the main point is to undercoat the model in a gloss black which is then top coated with mist coats of the final colour, and then a clear coat, but whilst doing a bit of research I came across an article by Antonio Santana (Link to Stainless Steel colour article) where he outlined his findings on using the Alclad 2 system and he found out that he got a better finish using a gloss dark gray undercoat rather than a gloss black undercoat with Chrome as the final colour (he has also written an article in the Sep. 2013 Model Railroad Hobbyist magazine (Link to model-railroad-hobbyist magazine 2013-September), when looking at the photos in his article I thought the models looked too shiny compared to what I have seen of the Southern Aurora where the stainless looks a bit duller so I experimented on a spare Lima Indian Pacific car I had with the gloss dark gray and a gloss black with the stainless steel colour over the top. I showed the end result to a few friends, both in the hobby and outside of the hobby and they all said they preferred the stainless over the dark gray base coat, (in the photo below  the Gray base coat on the left hand side, the Black base coat is on the right hand side) its more noticeable in real life and the side that has the black base coat is noticeably darker.


Hard to see in the photos but certainly noticeable in real life, the Black undercoat is on the right and results in a darker stainless colour than the grey undercoat.

The colour I used for the base coat was a Mr Colour Engine Gray (#339) (and yes I bought it from BNA Model World - no association with them except for a happy customer)


, though I did run low so added some gloss black to extend it & so the final gray is quite a bit darker than the original test, though this does not seem to have affected the final outcome, one of each of the models in their undercoat grey and their corresponding finished stainless steel  are below.
Plain Engine Gray (#339) on left and the Black & Gray mix on right


Same models showing the stainless over the base coats - not much difference between the 2 grays


 MHN


 NAM


 RMS


BCS


LAN


PHN


MBK

And off course the Southern Aurora also had a car transporter, so my one had to have one too, this is based on the Strath Hobbies BKX, only real modification I've made to the kit is gluing the Motorail & NSWR nameboards  appropriately and replacing the bogies with a set of 2CM bogies from SDS models (Thanks Steve).

My method of painting the models was to give them a good scrub with Gumption and an electric toothbrush, followed by Mr Colour 1000 Surfacer (Primer),


I then touched up any areas I was not happy with,  again I scrubbed with gumption & the toothbrush, then the dark gray undercoat & finally the stainless steel topcoat.
A word of warning/advise about the Alclad 2 paint - it gives a result that I am very happy with - I like the look of it, BUT it is very unforgiving if there are any minor blemishes, as an example where I joined the roof pieces together to get the roof I wanted the paint highlights where it was joined or where the original 'silver' paint was rubbed back and even though it was primed and undercoated with gloss gray and it looked OK, the final Alclad 2 top coat showed off where the join was made, on another car I accidentally dropped a bit of thinners (I used as glue) on the side corrugations, this caused the Lima 'silver' paint to craze & even though I rubbed it back and primed over it still shows though, so it is good stuff but one has to be careful, in hindsight I probably should have stripped the original paint off, but I will use this again where needed.

I used one of my cars whilst experimenting the the decals, this led to the silver 'rubbing off' around some of the window frames due to handling the model which had not being clearcoated as yet I've tried to highlight with a red circle the area in question in the following photo 


easy enough fix - simply mask over the silver with some 'Blue' tape and re-sprayed, or so I thought, looks like the silver paint 'lifted' when he tape was pulled off a few hours after it was applied hopefully one can make out where the paint lifted off, again highlighted with a red circle - BUT - be careful as even though the models have been clearcoated the silver still rubbed off slightly whilst fitting the windows - lesson learnt - fit (but don't glue) all windows before painting, then remove windows & then paint the body so as to lessen the handing of the painted model - too late for these models but a learning point for the next models I have a go at.


The Alclad 2 comes pre-thinned and I got about 2 3/4 cars per bottle. this was top coated with the Alcad 2 clear basecoat after the models where decalled. Talking about the decals, I got them from Geoff @ Custom Hobby Decals (www.customhobbydecals.com), again just a happy customer. As luck had it Geoff was making some new signs for some real Southern Aurora cars & so we where able to piggy back of them, supplementing them with some photos & measurements I had previously taken when researching the cars down at ARHS ACT which Geoff used to make the remaining decals, so if anyone needs a full set of Southern Aurora decals then Geoff's your man, I believe that Casula Hobbies stock them. The decals are pretty easy to apply, but not like what I am normally use to, but if you follow Geoff's instruction (I let them soak for about 30 seconds and then peel them of the backing sheets) then they go on easily, please note that the decals are 'cut' around the perimeter saving the hassal of having to accurately trim them oneself. I am thinking that with the Alclad paint that I should have clearcoated the models before decalling, as well as after, so the decals have a nice glossy surface to adhere to.

I bought all my paint from BNA Model world, no association with them, but they had all I needed (including some model car stuff), I believe that Kellets in Liverpool, NSW also stock the Mr Colour range of paints, not sure about the Alclad 2 paints.

Windows are made from 1mm poly-carbonate I found when up in Coffs Harbour a few years back, but any plastics supplier should have it, it was cut using the cut & snap method, similar to styrene, it was then finally shaped with a file to suit, pretty easy material to work with & I like the end result.

All the cars have interior lighting, one of the end cars has a home made DCC decoder driving the marker lights and the lit Southern Aurora sign (which is attached to either the PHN or MHN depending on direction of travel), the other car simply has the marker lights LED in series with the 'Southern Aurora' sign LED which means if the sign is not connected then the markers do not light up, pretty simple really, the sign is connected to the carriages via IC sockets.  This is visible in the below photo of the MHN, the IC sockets are the 2 small holes mid way down the end, they are not that noticeable on the model and the car that does not have the sign is normally next to the loco & thus even less noticeable.


A photo of the lit end is at the end of this blog.
Talking about the lit nameboard, I used a photo I had taken at Central a few years back as a mask to create it in Corel Draw, this was then printed on a colour laser copier onto decal paper a couple of times, then I applied one decal to the nameboard, and tested it when dry, this showed that the light bled through too brightly and was very visible through the blue, I then over painted the blue with a gloss black (being careful not to get it onto the actual lettering)  and when dry with a gloss white, and then applied a second decal over the top, this pretty well stopped the light bleeding through.

The rest of the cars a have simple circuit I found on the web by Jim Betz that uses a Bridge rectifier, a zener diode and resistors (as pictured below, photo from Jm Betz's site) to power the LEDs (Flicker Free Lighting Circuit), - just make sure you cut the tracks as appropriate, I didn't & let the magic smoke out of the various components :-(


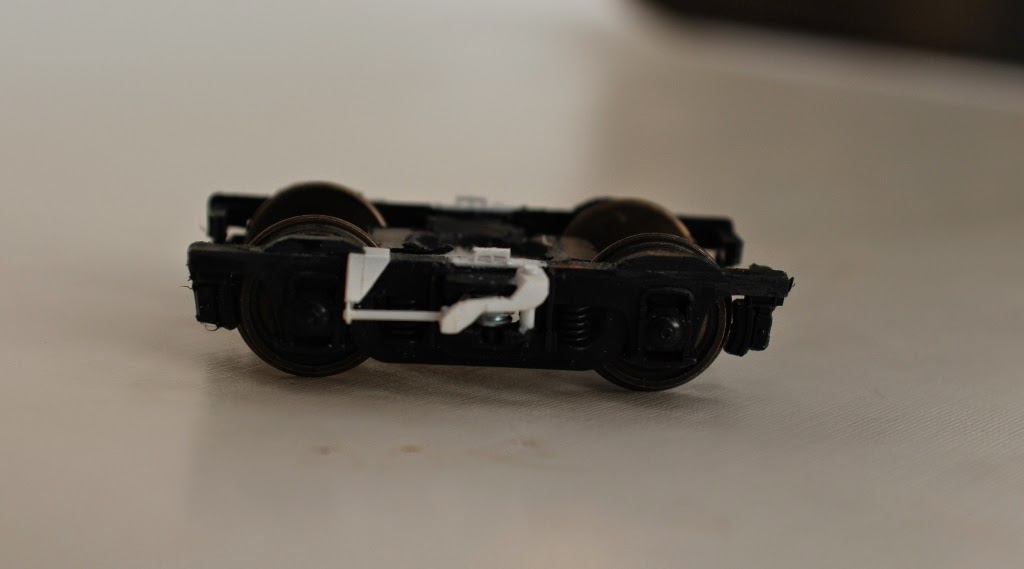
All bogies have electrical pickup, the 2BS are from Eureka (as used in their HUB set) and come with inbuilt pickup, the 2BU are modified Lima bogies with pickup via brass bearing and soldered connections to them, not the best but seems to work, BTW I ended up just soldering all the components together bypassing the use of the circuit board which made it a much more compact package.

Anyways, thats it for now and ends the saga of my build of the Southern Aurora cars, its been a long but enjoyable project & I've learnt heaps which I hope I can apply to other modelling projects, all thats left now is just a few pictures to finish off with and to wish all a Happy New Year.


 On Colo Vale on it's first trip

At the Oct 2015 Sydney Exhibition at Liverpool on the Epping MRC Binalong Layout.


At speed passing through Binalong

Who's that knocking at the door ...


The END


Tuesday, September 8, 2015

LED Marker lights for the Austrains 36 and Trainorama 32

Its taken a bit longer than anticipated to get this post ready, partially because of a couple of issues I had (which I've detailed later in this post), I hope its of some benefit to other modelers.

As I mentioned in one of my previous posts, whilst I've been mainly mucking around with the Southern Aurora, I've taken the opportunity to briefly do some other modelling, in this case making working White & Red marker lights for the Trainorama 32 and the Austrains 36, it been a relatively quick, mainly fun but occasionally frustrating project, the longest part of this little project has actually been waiting for some bits to turn up, and then lately finalising the Southern Aurora also got in the way.

I originally purchased some red & white markers that where nothing more than a red & white 0603 (I think) glued back to back, and the corresponding wires soldered to them, they where not that cheap & I unfortunately ended up blowing a couple of them as I was mucking around with the 32. When I went looking for replacements I thought that there had to be something better & I came across this web sites (Link to LEDs) - if the link does not work try cutting & pasting the following "http://www.led1.de/shop/lng/en/led-smd/smd-led-series-0603/duo-led-smd-0603-red/white-wemrw01-c2m.html" which has what appears to be two LED dies (not sure if that the right terminology) in a package about the size of an 0606 LED (I've also since starting this post seen similar LEDs on eBay,eg: SMD eBay LEDs), these LEDs are pre-wired, but be careful how they are wired (see Ray P's Bylong Blog for details - Bylong LED Blog). You can see the SMD LEDs in the following photo where they have been glued to the front of the Austrains existing front marker lights (which have had the front of them shaved/trimmed off) - I've also got them on the Traino 32 and a DJH 30T I'm currently working on.

By the time they are painted they look the part.


 And they don't appear as harsh as the photos show.

A minor issue is that the red light emits from top right & the white light emits from the bottom left, but this is not really a problem because I  make a lens for the marker light by placing a small dab of white glue in the centre of the Led which when it dries leaves a dimple of glue, this is quite visible in the side on photo of the Traino 32 markers treated in this way


I then paint the marker light black leaving the 'dimple' unpainted which makes it look like a lens with the light comes out of the centre of the 'marker' - its also ended up being pretty good for size

There is also a warm white/red combo which would probably have been better, but again I don't think that's a problem as I'm pretty sure a touch of clear orange on the lens (or maybe a smear of black texta will tone them down some, or maybe a higher value resistor to cut down the light emitted). Unfortunately I ended up blowing a couple of the TCS WOW decoders which TCS replaced. no questions asked, more on this later.

With both these models I've had to run some extra wiring between the tender and loco, to help with this I've used a TCS 4 pin minature plug which I bought from MRC @ Blacktown, the plugs are delicate but work well.

As a side issue I've also placed a 'Sugar Cube' speaker inside the boiler of the Traino 32 - that's had its own issues, I initially made a single PCB board from some spare circuit board I had,  I cut the copper to make individual pads, used a meter to make sure that there was no short and then soldered the LED & speaker wires to their individual pads, I'm not sure why but I had to separate the PCB that I was using to distribute the power to the LEDs & speaker into 2 separate boards, for some reason I was getting some sort of feedback which resulted in power getting to the LEDs causing them to glow dimly & eventually ended up incapacitating them, they didn't smoke or blow, they just stopped working. By separating the PCBs into one for the LEDs & a separate PCB for the Speakers all was good & yes I ran a meter between the tracks/traces & it showed no resistance yet there still seemed to be power getting thru, anyways, it all works OK now & that's all that really matters.

Speaking of Sugar Cube speaker, they are most definitely not all created equal. I was fortunate enough for Marcus Ammann to bring his sound 45 for a demo at a meeting a little while ago, Marcus has 2 'sugar cube speakers' setup in the loco selectable via a slide switch, one was a 'Streamlined Back Shop' speaker -( SBS sugarcubespeakers)  & the other was an eBay special & the difference was like chalk & cheese with the eBay special sounding very tinny & the SBS one sound very good to me. I must've got lucky with the eBay 'specials' I bought a while ago as they sound comparable to the SBS speakers which have a very good reputation, they cost about $2.00 each as a 10 pack with free postage, from memory they where marked as a NOKIA speaker/buzzer, but I'm not sure if they are still available, but there is a speaker made by Knowles which also have a good sound & are available from Digi key, unfortunately they are a bit dearer and postage from the States is not the cheapest. The 32 originally had 2 of these Nokia speakers in the tender and a third in the smokebox, after hearing Marcus's demo I decided to experiment by bypassing the speakers in the tender & realized I got a nice sound with just the one speaker in the smokebox & so promptly removed the speakers from the tender - good thing is that gives me 2 more speakers that I would otherwise not have had.

I also have to give a great big thumbs up to TCS DCC, as I mentioned I ended up blowing a couple of LEDs & also a couple of WOW sound decoders (Version 1), I emailed TCS & they said send them back & they will replace them, no questions asked, and they did, with the WOW v.3, can't complain about that,  it's been a real pleasure to deal with them, and their techo , Dave, is a great guy to work with, they certainly have my business and am looking forward to getting a few of their new Diesel decoders.


Monday, December 22, 2014

backdrops

Ohh what a difference a bit of painted cardboard makes.

I've been getting a bit sick & tired of the look of the layout & the extremely slow progress of anything happening on it, & whilst I have been busy doing stuff, it certainly is not reflected on the layout and thats really frustrating, so I took the plunge & decided to make the backdrops for behind the lower level of the layout and I gotta say what a difference the backdrops make. It's taken me a few weekends to paint the set below but I'm pretty pleased with the outcome.

I've included a couple of before and after shots and while it's only a backdrop and nothing else, it hopefully does convey a bit of what I'll be trying to achieve.

So, what a section of the layout looked like before I installed the backdrop


I initially tried to force the 3mm MDF into a curve & whilst it does work (I used a steamer to help in bending the MDF) it unfortunately resulted in the roundhouse (or at least whats built of it so far) not fitting, but it did look fairly good to me and while it can't be made out in the photo the backdrop starts to curve from just about where the mountains are, (or are they hills:-)

I was contemplating cutting the roundhouse down from a 5 stall to a 4 stall unit, but then thought that a better option would be to cut a slot half way into the rear of the backdrop and to then crease in the backdrop to force it into a corner rather than a gentle curve, the result is as in the photo below, yep the crease is very visible, and whilst not quite a hard edge it is noticeable, but to me better than cutting down the roundhouse and I think is better than seeing the support timbers in the 'before' photo.


And the culprit in its position, sorta, at least it fits with about 10mm to spare, now I've just gotta get too & finish it.


I've also started doing a bit of modelling with a mate where we are setting aside a day a week or so to make something we both need, and our first modelling session is making some watertanks following Peter Jarvis's article in the April & June 2013 AMRM, I'm making a couple of tanks, one a standard Casula Hobbies 40,000 gal tank and the other a cutdown 20,000 gal tank. I've deviated from the article for the 20,000 gal tank by making a timber stand (I've based it on Rankin Springs as described on ghsignal's blog : link to ghsignal's water tank blog), I've used North Eastern Scale lumber to make the tank stand and it will be going on my version of Dunedoo, and I have to thank Rod's NSWGR Southern Line in a shed site (Southern Line) for the weathering tip using raven oil (I got mine from Blue Ribbon Saddlery @ St Marys, Sydney), I diluted it about 1:100 with metho as Rod recommends and I think it works like a charm, very happy with the result.
I'm hoping to have it, and it's 40,000gal counterpart, for which I have to make the steel stand,  finished early in the new year depending on how many sessions we can fit in and how much of a hassle it will be making the steel stand and it's braces and I also have to hunt down a jib for the timber stand, pretty certain I have something somewhere, just gotta find it.


Anyways that's it for now, I wish all a very Merry Christmas and  Happy & Prosperous New Year.


Saturday, October 11, 2014

Not much to show

Hi All,

Well, I started writing this update just before father's day, then life got in the way, The Sydney Exhibition has come & gone and now we all know that Auscisions new model is the 421 and very nice it looks too,  and as I look back at this blog I realize it's been well over a year since my last post, and in some ways I really haven't got too much to show for it, and then again I've done a fair bit, just not a whole lot to show for it.

The majority of the last year or so has been spent working on the Southern Aurora cars in some way or another. I've experimented with making my own casting & whilst its certainly taken a fair amount of time (& money) experimenting & researching the latest on mould making & casting I am pretty pleased with the outcome, and the majority of my underbody details are from castings that I've made the masters for, most can be seen in the following photo:
Also can be seen are the straps that hold the air & water tanks in place, these are also a casting and the masters where made from fine brass angle bent to shape, for most of these castings I've inlaid a piece of wire for strength, but I did run out of wire for the last few I cast and I must say that I'm pretty impressed with the strength of the polyuerethane, the brass hand brake detail are from Keiran Ryan's 'S' truck details which look good to me.

A couple of masters I made for the Southern Aurora are in the next photo, the condensers are modified from Casula Hobbies RUB car items - WITH Permission from Joe, they have been deepened to the correct depth, the side louvers have been added and minor detailing added to the front, was it worth it, time will tell, the other item is an electrical box,


both can been in the following photo.


Most of the moulds I've made are plain open top moulds that the resin is simply poured into, but one is a 2 part mould that I then inject the resin into using a syringe - and while I did bugger up the finer bits of making the mould (I used Clay to place the master into but it was not very level & I did not notice that util after the rubber was poured) I am never the less very happy the way that one turned out & certainly I'll be using that method in the future where needed. Just as a side note with the casting, I've found that the polyurethane resin I use (Barnes Pro-cast) casts very nice if I dust the moulds with talcum powder & then place the moulds into a pressure pot & have the pressure set at around 40PSI, the castings have minimal air bubbles and appear nice and crisp.

So the Southern Aurora cars are now complete as far as the bodies go, all 10 of them. The interiors have been built & painted :
 Lounge car interior
 Dining car interior
Sleeping car interior, I've only got one central wall, it should really be a corridor with doors, but hey I'm lazy &  how much will one really see when the train is moving.

Interior for the other type of sleeping car, this side shows the two tone wall colour scheme & the painted on doors.

- bit rough, but as I've said , how much will one really see when the train is rolling past and also the four sets of Victorian 2BU bogies have been completed for their respective cars using the original Lima bogies:

Just as a side point, as per Ian's article  I glued a piece of 40th styrene as a bearing point in the bolster, I initially tried superglue/Cryo, but it , naturally, did not really take all that well, if the bogie was flexed it tended to break the bond, then whilst at my local Aldi Store I came across a 'workzone MMA' glue, this to me has worked really well, but I've only seen it there the one time I bought it, but be aware it does have a smell to it, and a shelf life of about 6 months, but I do like the way it works.

I'm currently completing the underbody detailing and also making the windows, as I mentioned in one of my previous posts I was fortunate enough to pick up some 1mm clear poly-carbonate when I was up in Coffs Harbour for my last employer a few years ago, and experimented with it & was very happy with the results, and this is the material I've been using to make the windows with, it cuts easy (using the score & snap method - same as for styrene) and sands easy, I should have the windows finished soon, then the blinds and that should just about make the cars ready for the paint shop and I'm hoping to get them painted over the coming summer. It's been a long project, but worth it. And just as a preview I've included a few of photos of some of the cars.

The Power Car, note its battery boxes are different to the battery boxes under the other cars.

The Baggage Car

The Dining Car, its handbrake is made from a combination of Keiran's spider handbrake and the Model Etch 18" 6 spoke round handbrake wheels (its what I had available at the time), I dare say one of the ModelEtch 4 spoke handbrake wheels would have been a good choice.


one of the sleeping cars


As for the layout, well it hadn't seen a train for over a year or so but as I had a meeting at my place with a group I associate with a few months ago I put the Southern Aurora aside, for a short while, so I could concentrate on the layout & at least got it running again, to a degree.

Lately I've been toying with working front & rear red & white marker lights on a Traino 32 and an Austrains 36,  but that will be for another post, hopefully sooner rather than later.

Until next time.