Well, I started writing this update just before father's day, then life got in the way, The Sydney Exhibition has come & gone and now we all know that Auscisions new model is the 421 and very nice it looks too, and as I look back at this blog I realize it's been well over a year since my last post, and in some ways I really haven't got too much to show for it, and then again I've done a fair bit, just not a whole lot to show for it.
The majority of the last year or so has been spent working on the Southern Aurora cars in some way or another. I've experimented with making my own casting & whilst its certainly taken a fair amount of time (& money) experimenting & researching the latest on mould making & casting I am pretty pleased with the outcome, and the majority of my underbody details are from castings that I've made the masters for, most can be seen in the following photo:

Also can be seen are the straps that hold the air & water tanks in place, these are also a casting and the masters where made from fine brass angle bent to shape, for most of these castings I've inlaid a piece of wire for strength, but I did run out of wire for the last few I cast and I must say that I'm pretty impressed with the strength of the polyuerethane, the brass hand brake detail are from Keiran Ryan's 'S' truck details which look good to me.

both can been in the following photo.

Most of the moulds I've made are plain open top moulds that the resin is simply poured into, but one is a 2 part mould that I then inject the resin into using a syringe - and while I did bugger up the finer bits of making the mould (I used Clay to place the master into but it was not very level & I did not notice that util after the rubber was poured) I am never the less very happy the way that one turned out & certainly I'll be using that method in the future where needed. Just as a side note with the casting, I've found that the polyurethane resin I use (Barnes Pro-cast) casts very nice if I dust the moulds with talcum powder & then place the moulds into a pressure pot & have the pressure set at around 40PSI, the castings have minimal air bubbles and appear nice and crisp.
So the Southern Aurora cars are now complete as far as the bodies go, all 10 of them. The interiors have been built & painted :


Sleeping car interior, I've only got one central wall, it should really be a corridor with doors, but hey I'm lazy & how much will one really see when the train is moving.

Interior for the other type of sleeping car, this side shows the two tone wall colour scheme & the painted on doors.
- bit rough, but as I've said , how much will one really see when the train is rolling past and also the four sets of Victorian 2BU bogies have been completed for their respective cars using the original Lima bogies:
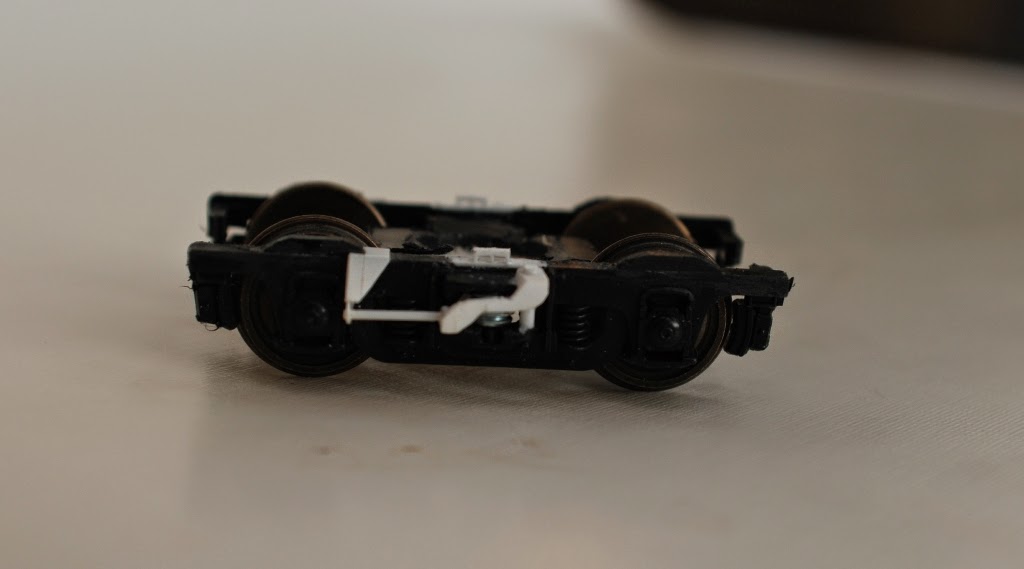
Just as a side point, as per Ian's article I glued a piece of 40th styrene as a bearing point in the bolster, I initially tried superglue/Cryo, but it , naturally, did not really take all that well, if the bogie was flexed it tended to break the bond, then whilst at my local Aldi Store I came across a 'workzone MMA' glue, this to me has worked really well, but I've only seen it there the one time I bought it, but be aware it does have a smell to it, and a shelf life of about 6 months, but I do like the way it works.
I'm currently completing the underbody detailing and also making the windows, as I mentioned in one of my previous posts I was fortunate enough to pick up some 1mm clear poly-carbonate when I was up in Coffs Harbour for my last employer a few years ago, and experimented with it & was very happy with the results, and this is the material I've been using to make the windows with, it cuts easy (using the score & snap method - same as for styrene) and sands easy, I should have the windows finished soon, then the blinds and that should just about make the cars ready for the paint shop and I'm hoping to get them painted over the coming summer. It's been a long project, but worth it. And just as a preview I've included a few of photos of some of the cars.

The Power Car, note its battery boxes are different to the battery boxes under the other cars.

The Baggage Car

The Dining Car, its handbrake is made from a combination of Keiran's spider handbrake and the Model Etch 18" 6 spoke round handbrake wheels (its what I had available at the time), I dare say one of the ModelEtch 4 spoke handbrake wheels would have been a good choice.


one of the sleeping cars
As for the layout, well it hadn't seen a train for over a year or so but as I had a meeting at my place with a group I associate with a few months ago I put the Southern Aurora aside, for a short while, so I could concentrate on the layout & at least got it running again, to a degree.
Lately I've been toying with working front & rear red & white marker lights on a Traino 32 and an Austrains 36, but that will be for another post, hopefully sooner rather than later.
Until next time.